Follow Me On Social Media!
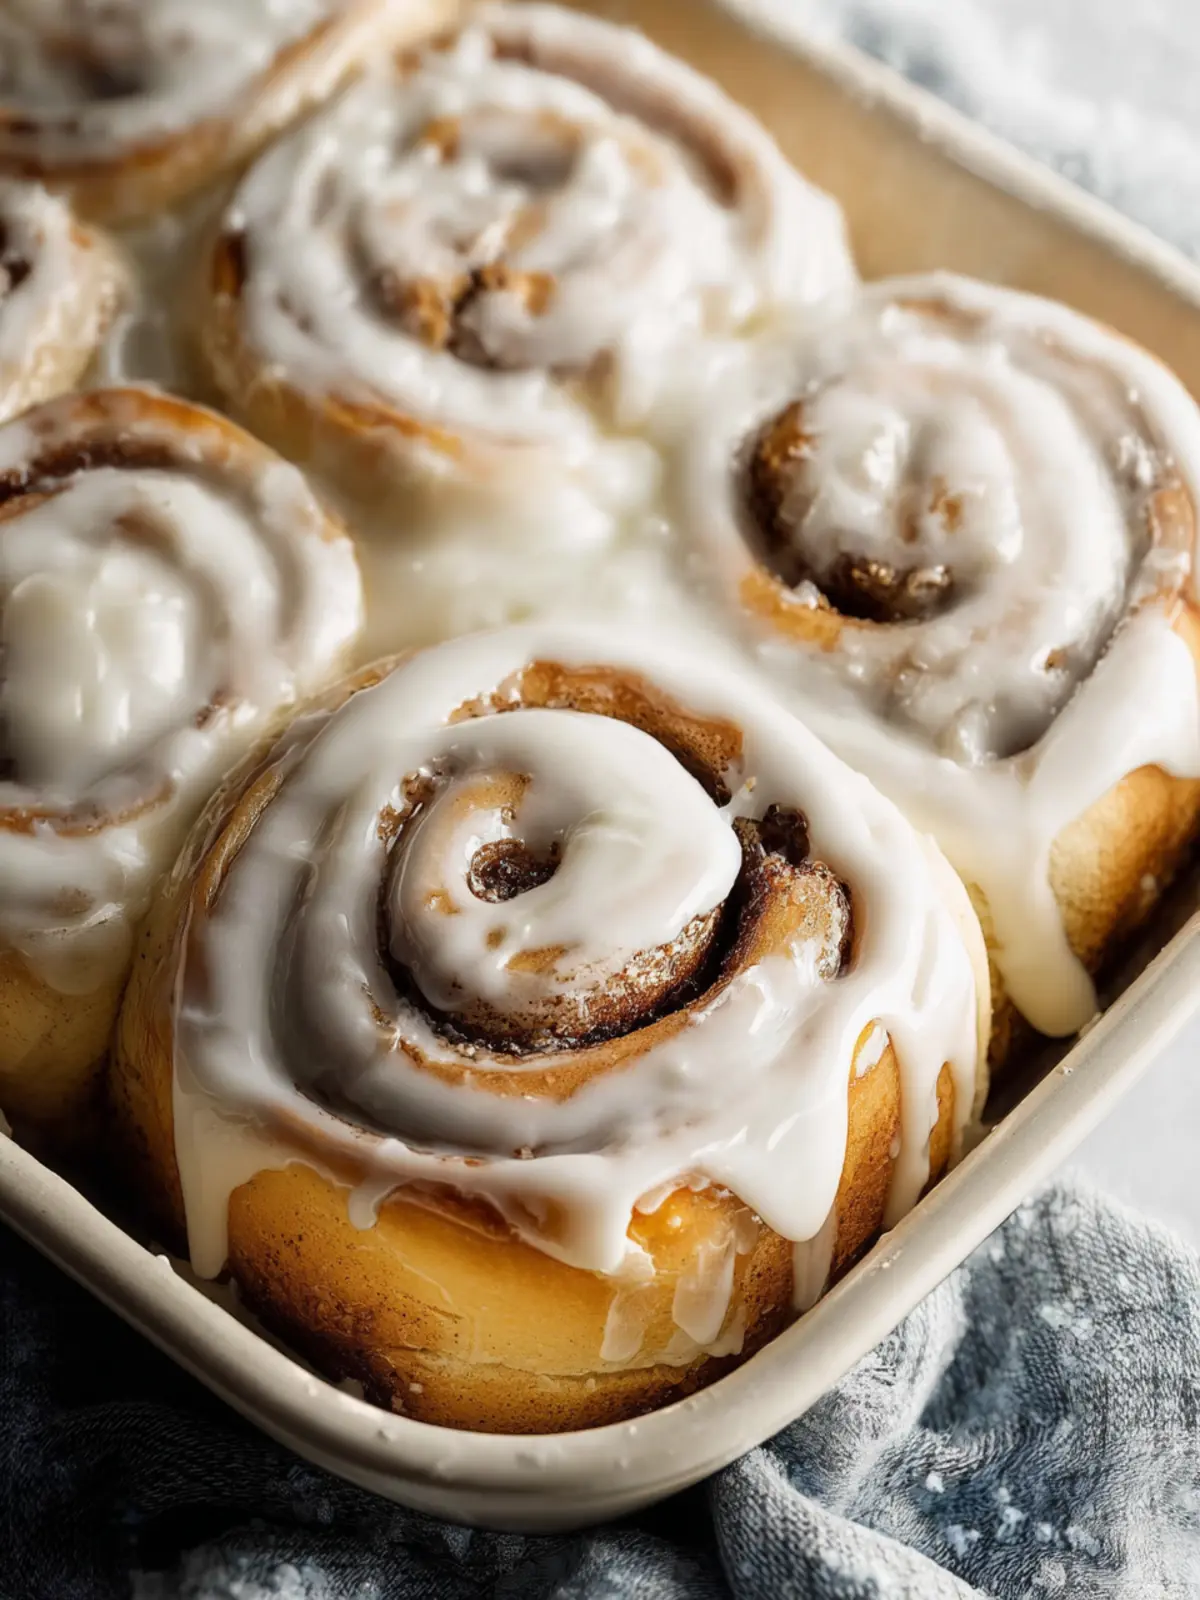
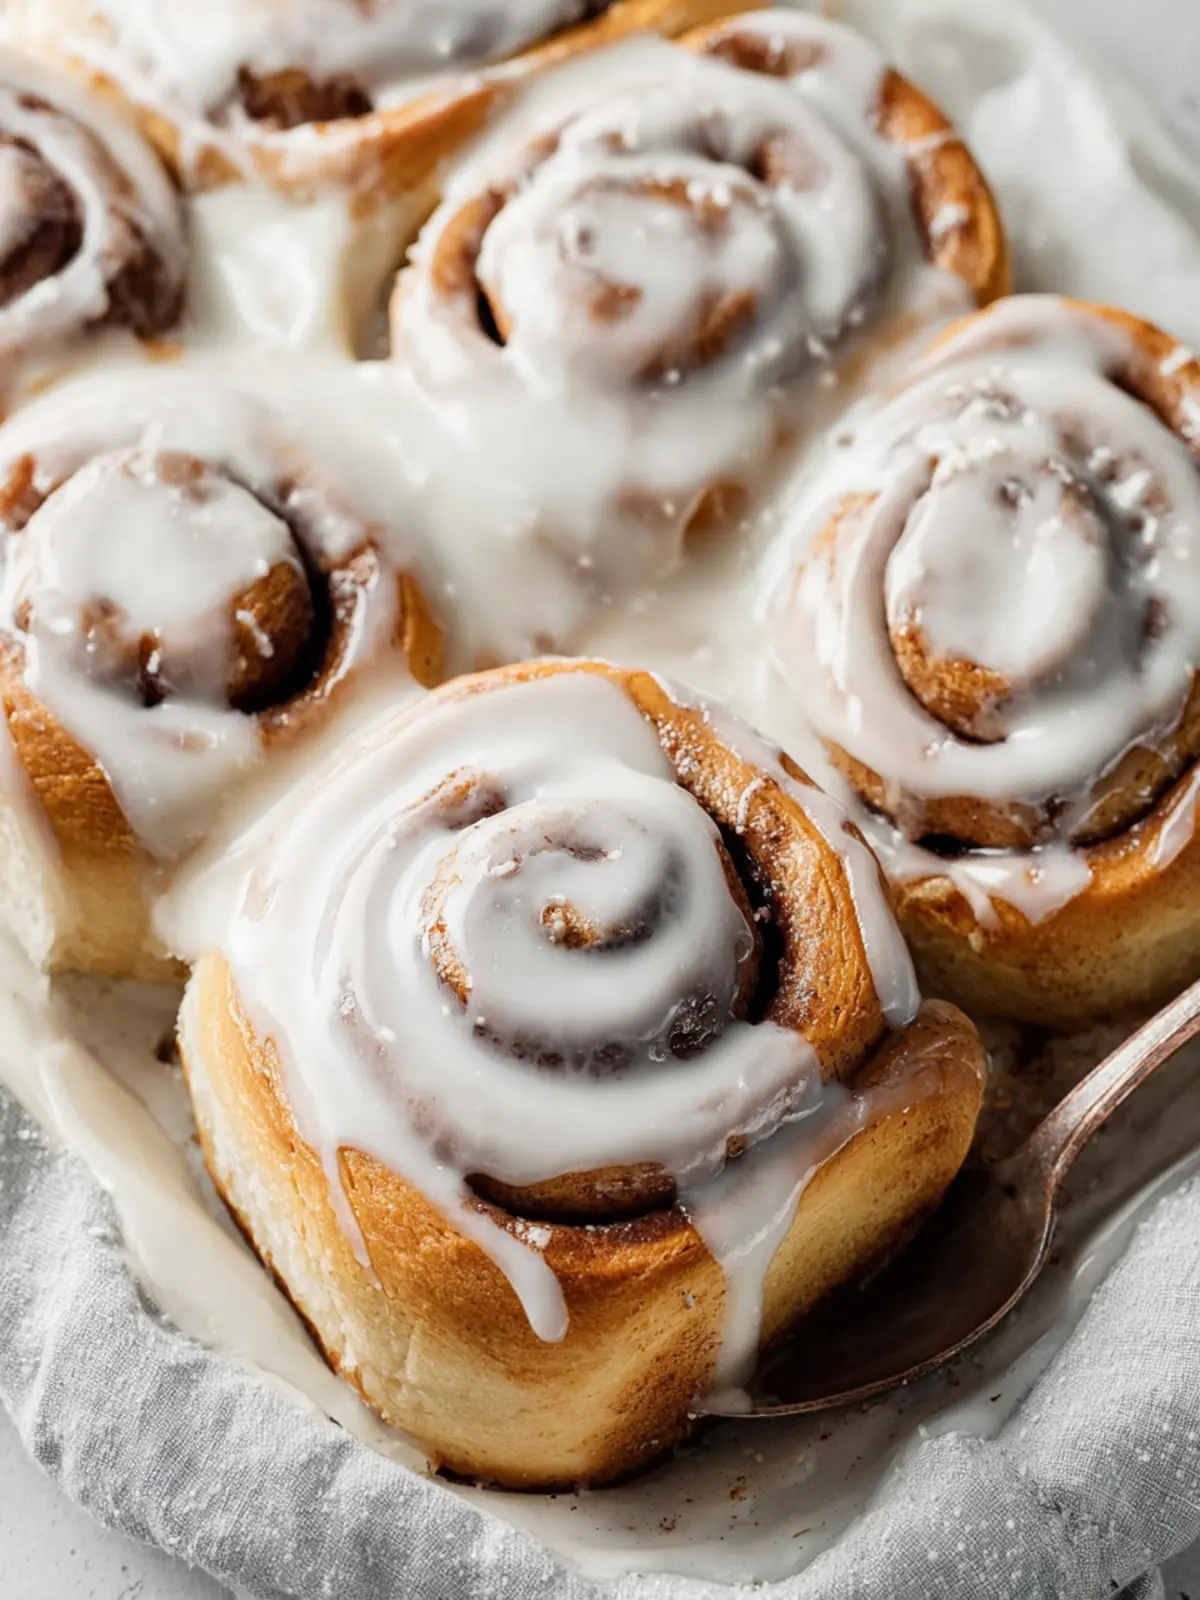
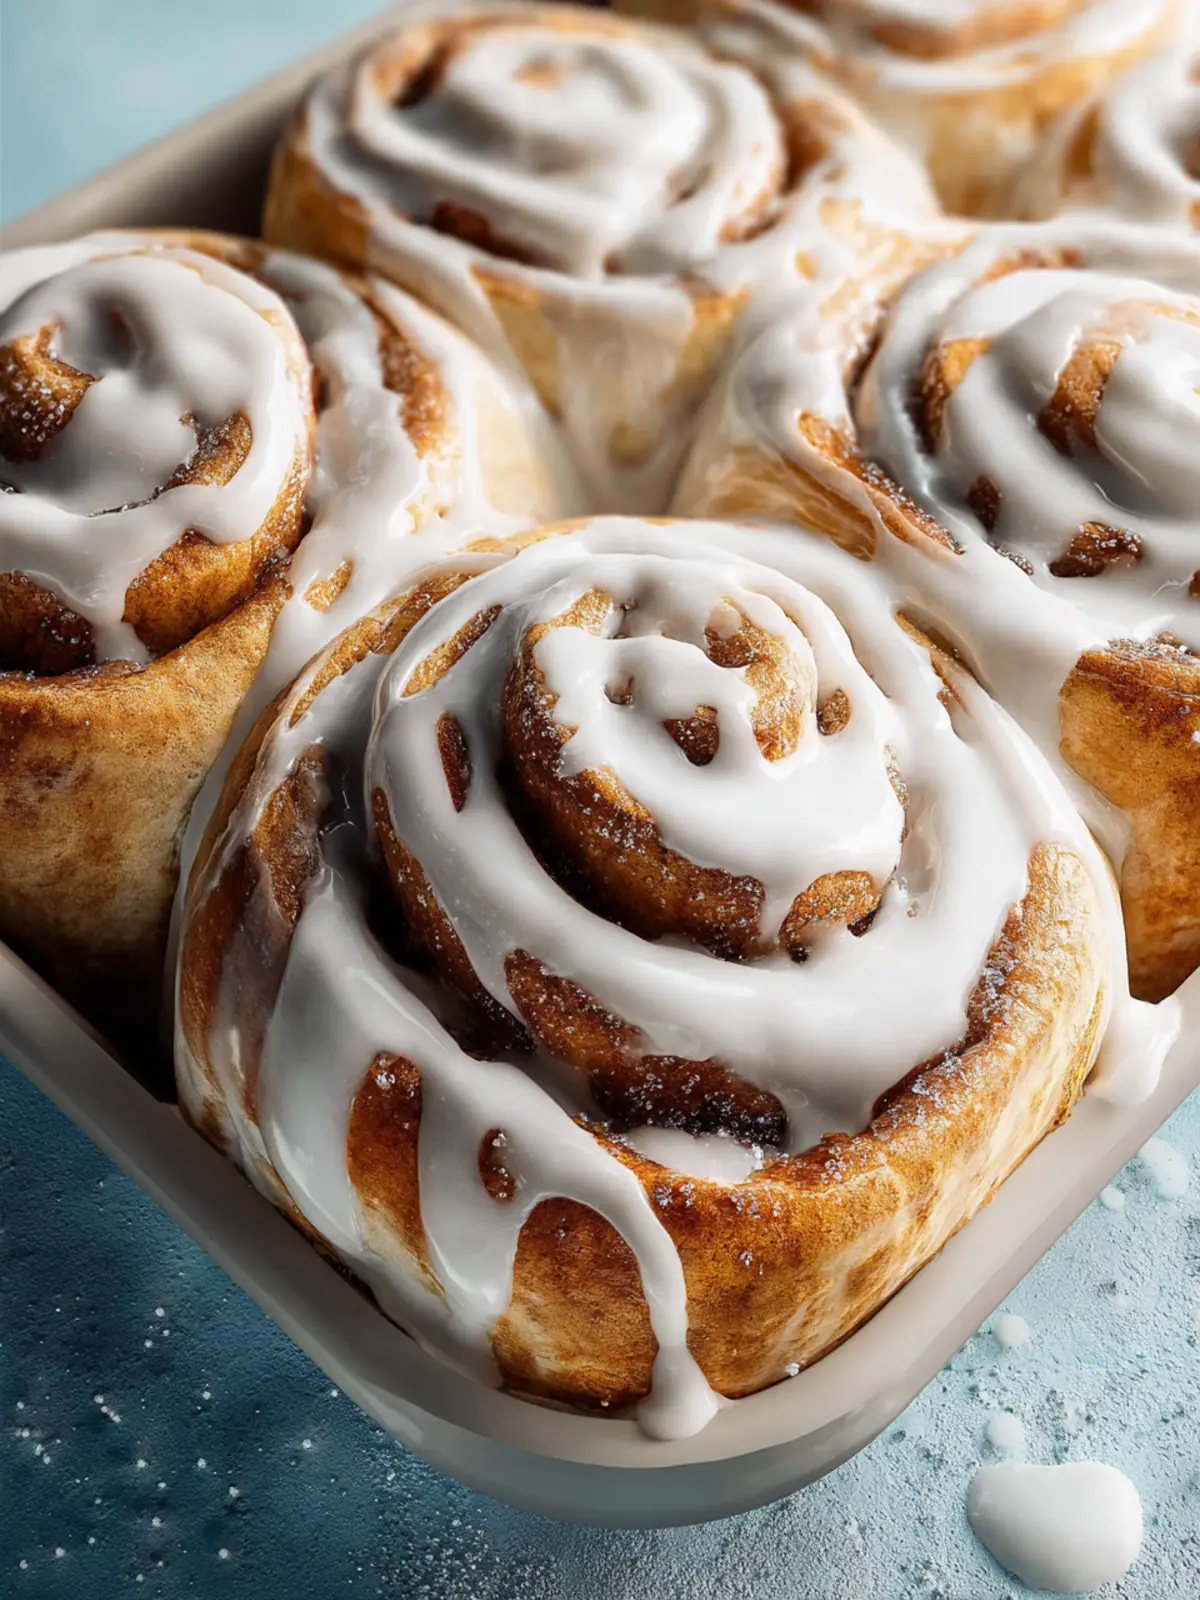
High Altitude Homemade Cinnamon Rolls: Irresistibly Soft with Vanilla Icing
Introduction to High Altitude Homemade Cinnamon Rolls with Vanilla Icing
Imagine waking up on a lazy Sunday morning, the aroma of high altitude homemade cinnamon rolls wafting through your home, irresistible and warm. It’s that delightful blend of sweet and spicy that intertwines with your cozy atmosphere, inviting you to linger just a little longer over your coffee. There’s something about freshly baked cinnamon rolls that transforms an ordinary morning into a special occasion, often prompting nostalgia for family gatherings and holiday celebrations. For those of us living at higher elevations, perfecting that tender dough and gooey filling can seem like a challenge, but the reward is truly worth the effort.
When you’re crafting these high altitude homemade cinnamon rolls, the ingredients and the chemistry of baking play crucial roles. The lower air pressure can affect how your dough rises, but with a few adjustments, you can achieve that perfectly fluffy texture. Just picture it: Those warm rolls slathered in creamy vanilla icing are not only a treat for the taste buds but also a feast for the eyes.
Baking at altitude gives you the chance to experiment and hone your skills, making the process that much more rewarding. Here, we not only embrace the appeal of cinnamon rolls but also tackle the intricacies of high-altitude baking. You’ll discover tips on ingredient ratios, optimal rising times, and even how to combat the whims of Mother Nature with homemade goodness that rises to the occasion.
As you follow along in this journey of making high altitude homemade cinnamon rolls, allow yourself the indulgence of the slow and sweet. Every swirl of cinnamon sugar swirl is a promise of comfort and joy, ready to beckon those you love to sit and savor each bite. So pour yourself that cup of coffee, roll up your sleeves, and let’s dive into this irresistible recipe together, transforming a lazy morning into a blissful experience filled with warmth and sweetness.
Key Ingredients for High Altitude Homemade Cinnamon Rolls
Flour
For high altitude homemade cinnamon rolls, all-purpose flour is my go-to choice. It provides the perfect structure without making your rolls too dense. At higher elevations, flour tends to absorb more moisture, so you might consider adding a little extra to the dough for the right consistency.
Yeast
Using active dry yeast is ideal for these rolls, as it helps achieve that soft, fluffy texture. Always proof your yeast in warm water with a dash of sugar to ensure it’s fully activated—this really makes a difference in lifting those rolls!
Sugar
Granulated sugar sweetens the dough, while also helping with the browning of the rolls in the oven. Since altitude can affect sweetness perception, don’t hesitate to adjust the amount based on your taste preference.
Milk
Lukewarm whole milk enriches the dough and adds moisture. If the milk is too hot or too cold, it can impact yeast activity negatively—aim for around 110°F for optimal results.
Butter
Melted butter adds richness and flavor, blending seamlessly into the dough. Be sure to let it cool slightly before adding it to the mixture, as too-hot butter can affect yeast performance.
Cinnamon
The star ingredient! A blend of ground cinnamon in the filling creates that classic, irresistible flavor profile. Use freshly ground cinnamon for a more robust taste.
Salt
This tiny ingredient packs a punch! Salt not only enhances the flavors but also regulates yeast activity. Be cautious—too much salt can inhibit rising, especially at higher elevations.
These key ingredients will help you craft the most delightful high altitude homemade cinnamon rolls, perfect for a cozy morning treat or gathering with friends. Enjoy the process and the sweet rewards!
Why You’ll Love These High Altitude Cinnamon Rolls
High altitude homemade cinnamon rolls transform breakfast into a dreamy experience. Imagine biting into a soft, pillowy swirl filled with cinnamon sugar, topped with creamy vanilla icing. Living at a higher elevation often comes with unique baking challenges, but these cinnamon rolls rise to the occasion—literally!
Perfectly Adapted for Elevation: At high altitudes, the lower air pressure can affect the way dough rises. This recipe takes the guesswork out of baking, ensuring you achieve that fluffy, decadent texture every time. You won’t have to worry about flat or dry rolls; they come out perfectly soft and gooey.
Deliciously Customizable: Are you thinking about trying different fillings? This cinnamon roll recipe invites creativity! Swap the cinnamon filling for nutty pecans or gooey chocolate chips to make it your own.
Great for Sharing: There’s something magical about a batch of homemade cinnamon rolls—especially when you share them with friends or family. Picture a weekend brunch where laughter fills the air while everyone indulges in a sweet treat.
When the aroma of these high altitude cinnamon rolls fills your kitchen, you won’t just smell the deliciousness; you’ll feel it too—a warm embrace on a plate that’s perfect for any occasion.
Tips for Making Perfect High Altitude Cinnamon Rolls
Creating high altitude homemade cinnamon rolls is a delight that can turn any day into a special occasion. However, if you live in a high-altitude area, you might face some challenges that can affect the outcome of your beloved rolls. Here are some straightforward tips to ensure your cinnamon rolls rise to fluffy perfection!
Adjusting Your Ingredients
- Flour: Consider using a little more flour than the recipe calls for. At high altitudes, baked goods tend to rise faster and may collapse; a slight increase in flour helps provide better structure.
- Yeast: Opt for instant yeast for better results. It’s more vigorous, which is helpful when the air is less dense.
Manipulating the Environment
- Humidity and Temperature: Keep in mind that both humidity and temperature can affect dough consistency. On drier days, your dough might require extra moisture; water or milk is your friend here!
- Rise Time: Allow more time for your dough to rise. Higher altitudes can speed up the process, so keep an eye on it but trust your instincts.
Baking Tips
- Oven Temperature: Baking times may vary, so start checking your rolls a few minutes earlier than suggested. Higher altitudes can cause items to bake faster.
- Grease Your Pans: Ensure your baking pan is well-greased or lined. This will help prevent sticking and ensure an easy release of those gorgeous rolls.
By following these tips, your high altitude homemade cinnamon rolls will be a hit, whether it’s a Sunday brunch or a casual weekday treat!
Time Details for High Altitude Cinnamon Rolls
Baking high altitude homemade cinnamon rolls can feel like an adventure, where precision in timing plays a pivotal role. Here’s what you need to know to perfectly navigate each step:
Preparation time
Set aside about 30 minutes for preparation. This includes gathering ingredients, mixing the dough, and rolling it into those delightful cinnamon swirls.
Rising time
At higher altitudes, your dough might require a bit more patience. Let it rise for approximately 1 hour, or until it has doubled in size. This step is crucial for achieving that fluffy texture we all crave!
Baking time
Bake your cinnamon rolls for about 25-30 minutes. Keep an eye out for that golden-brown color, which indicates they’re ready to come out.
Total time
In total, you’re looking at around 2 hours from start to finish, including preparation, rising, and baking. The delicious aroma wafting through your kitchen while you wait is totally worth it!
Nutritional Information for High Altitude Cinnamon Rolls
High altitude homemade cinnamon rolls not only fill your kitchen with warm, inviting scents but also provide a comforting treat with a surprisingly balanced nutritional profile. Here’s a closer look at the nutritional breakdown of these delightful rolls:
Calories
- Each roll contains approximately 250 calories, making it a satisfying snack without overindulging.
Carbohydrates
- With around 40 grams of carbohydrates per roll, these cinnamon rolls offer a quick energy boost, perfect for your morning routine or an afternoon pick-me-up.
Fat
- Each roll has about 9 grams of fat, which contributes to their rich texture and flavor. Opting for butter in this recipe enhances the overall taste while keeping it indulgent yet manageable.
Protein
- Providing around 4 grams of protein, these high altitude cinnamon rolls can help keep you feeling fuller longer, especially when paired with a warm drink.
Enjoy these rolls knowing they balance taste and nutrition, perfect for any occasion!
FAQs about High Altitude Homemade Cinnamon Rolls
Baking high altitude homemade cinnamon rolls might seem like a challenging feat—especially with the unique conditions at elevated terrains—but with a few handy tips, you can master the process. Here are some frequently asked questions to make your cinnamon roll journey smooth and enjoyable.
How do I adjust this recipe for lower altitude baking?
If you’re baking at lower altitudes, you won’t need the same modifications as you would at higher elevations. Start by reducing the flour in the recipe slightly; aim for about 1 to 2 tablespoons less per cup. You may also want to increase the liquid by a tablespoon or so to achieve the right dough consistency. This will help you create the warm, fluffy rolls we all crave!
Can I make these cinnamon rolls ahead of time?
Absolutely! You can prepare the dough and allow it to rise once, then roll it out and cut it into rolls. Instead of letting them rise again at room temperature, cover them tightly with plastic wrap and refrigerate overnight. On the day you plan to serve them, simply let them come to room temperature and rise again before baking. It’s a great way to enjoy freshly baked rolls with minimal morning effort.
What should I do if my rolls don’t rise?
If your rolls aren’t rising, check the temperature of your environment. Yeast needs a warm, draft-free area to thrive. If it’s too cold, try placing your dough in a turned-off oven with just the light on, or in a cozy spot on your counter. Also, make sure your yeast is fresh. If the dough still doesn’t rise, it might be worth using new yeast.
How can I store leftover cinnamon rolls?
To keep your high altitude homemade cinnamon rolls fresh, store them in an airtight container at room temperature for up to two days. If you want them to last longer, you can freeze them wrapped tightly in plastic wrap and aluminum foil. When you’re ready to enjoy them again, simply defrost at room temperature or warm them up in the oven for that freshly baked taste.
Conclusion on High Altitude Homemade Cinnamon Rolls
Creating high altitude homemade cinnamon rolls is more than just following a recipe; it’s about embracing the unique challenges that come with altitude baking. By adjusting your ingredients and techniques, you can achieve rolls that are fluffy, gooey, and bursting with flavor. Remember to keep an eye on your dough’s texture and rise, as the altitude can significantly affect the outcome. Whether shared with friends or enjoyed solo over coffee, these cinnamon rolls are sure to be a delightful treat. So, roll up your sleeves, channel your inner baker, and enjoy the fruits of your labor!
Print
Cinnamon Rolls
- Total Time: 2 hours 30 minutes
- Yield: 12 rolls 1x
- Diet: Vegetarian
Description
Delicious homemade cinnamon rolls topped with a creamy icing.
Ingredients
Scale
- 4 tbsp unsalted butter
- 3/4 cup whole buttermilk or whole milk
- 2 1/4 tsp (1 packet) instant/rapid rise yeast or active dry yeast
- 1/4 cup granulated sugar, divided
- 3 1/4 cups bread flour, spooned and leveled, divided
- 1 tsp coarse Kosher salt (if using table salt, use half the amount)
- 1/4 tsp ground nutmeg
- 2 large eggs (room temperature)
- 1 tsp vanilla extract
- 1 tsp almond extract (optional)
- 4 tbsp unsalted butter, melted
- 3/4 cup dark brown sugar, packed
- 1 1/2 tbsp cinnamon
- 1 1/2 cups powdered sugar
- 5–6 tbsp heavy whipping cream
- 1 tsp vanilla extract
- 1/2 tsp almond extract (optional)
Instructions
- Melt the butter in a small saucepan over medium heat. Add the buttermilk and stir. Warm the mixture just until it reaches between 110-115 degrees F; if it gets too hot, this will let you know that the yeast is active.
- In the bowl of your stand mixer, stir together 3 cups of the flour (reserve 1/4 cup for rolling out the dough later) with the warm milk mixture, the sugar, salt, nutmeg, eggs, and extracts into a rough shaggy dough. With the dough hook, knead on medium/low speed for 10 minutes.
- Lightly spray a large bowl with nonstick spray. Place the dough in the bowl, cover tightly with plastic wrap, and set in a warm place to rise until doubled in size, about 60-90 minutes.
- Set the bowl of dough, still covered, in the refrigerator to chill for 1-2 hours, or overnight. Chill time allows the gluten to rest and the dough to develop flavor.
- Turn the cold dough out onto a lightly floured work surface (using the last remaining 1/4 cup of flour to keep the dough from sticking). Roll your dough out into a rectangle measuring approximately 12×18 inches.
- Line a 9×13 pan with a sheet of parchment paper, or spray with non-stick spray.
- Melt your butter and use a pastry brush to spread it evenly over the dough. In a small bowl, mix together the brown sugar and cinnamon, then sprinkle that evenly over the butter.
- Roll up the dough (starting on one of the long sides) into a log, keeping it as tight as you can. Using a gentle sawing motion with a sharp, non-serrated knife, cut the dough into 12 rolls.
- Place the rolls, cut side up, in the pan. Cover the pan with a towel, and set in a warm place for 20 minutes to puff up a little, just until the rolls are touching.
- Preheat the oven to 350 F.
- Bake the rolls on the center oven rack for about 22-25 minutes, until they appear done in the middle, and the top is a pale golden brown.
- In a bowl, stir together all the icing ingredients until smooth. Immediately drizzle over the hot rolls.
- Let the rolls cool for about 10 minutes and serve warm.
Notes
- If using instant/rapid rise yeast, you can skip the step of proofing the yeast in the warm liquid.
- Chilling the dough makes it easier to work with.
- These rolls can also be baked in a muffin pan for a different presentation.
- Prep Time: 30 minutes
- Cook Time: 25 minutes
- Category: Dessert
- Method: Baking
- Cuisine: American
Nutrition
- Serving Size: 1 roll
- Calories: 350
- Sugar: 15g
- Sodium: 150mg
- Fat: 15g
- Saturated Fat: 9g
- Unsaturated Fat: 4g
- Trans Fat: 0g
- Carbohydrates: 50g
- Fiber: 1g
- Protein: 5g
- Cholesterol: 70mg