Follow Me On Social Media!
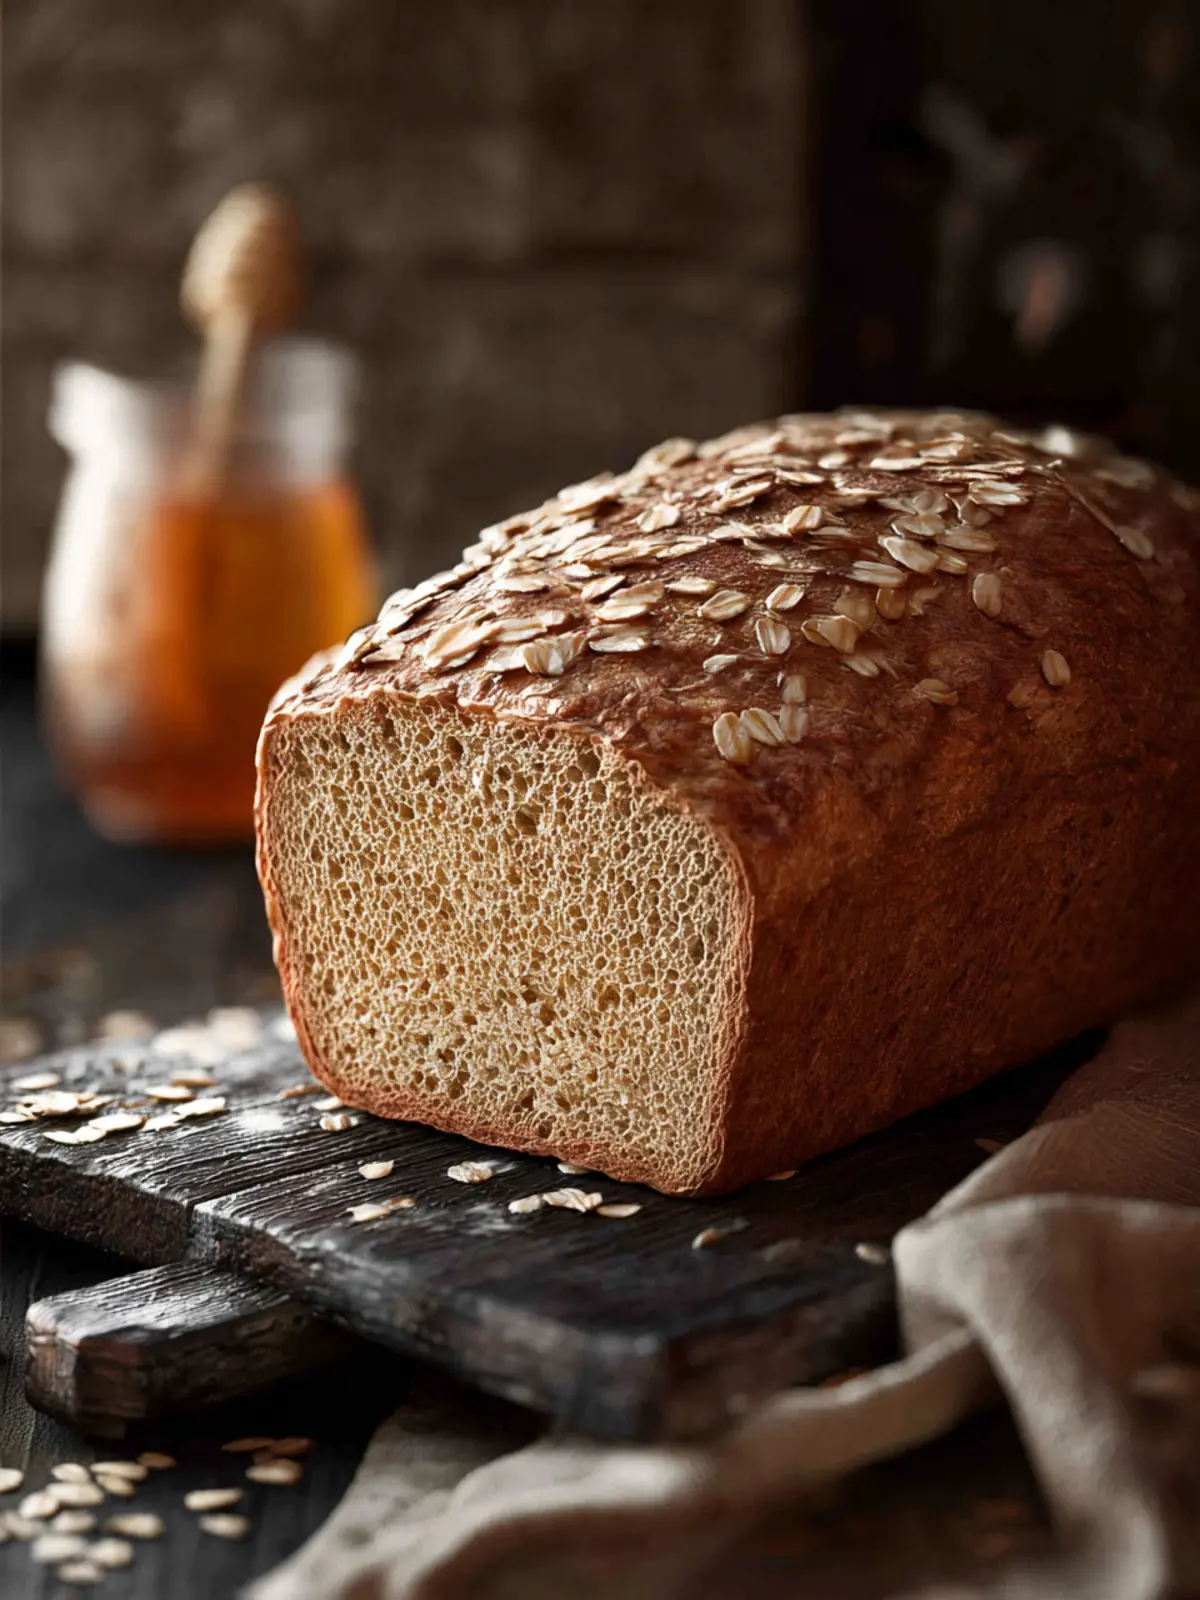
High Altitude Honey Buttermilk Oat Bread Made Easy at Home
Introduction to High Altitude Honey Buttermilk Oat Bread
Embracing the unique allure of high altitude honey buttermilk oat bread often sparks the imagination, blending the rich, wholesome taste of oats with the light sweetness of honey and the tang of buttermilk. Picture yourself enjoying a slice of this warm, freshly baked bread, where each bite captures the essence of comfort and nutrition. As someone who has ventured into the world of baking at elevations above 5,000 feet, I can tell you firsthand that achieving the perfect loaf can be challenging, but the rewards are well worth it.
What makes this recipe distinct lies heavily in how the interplay between the ingredients creates a texture and flavor profile that is simply irresistible. At high altitudes, traditional bread recipes can face challenges like uneven rising and dry textures, but this high altitude honey buttermilk oat bread was designed with these specifics in mind. The addition of buttermilk not only tenderizes the bread but also contributes acidity, enhancing the leavening effect of baking soda. This results in a light yet hearty loaf, making it an ideal companion for breakfast or as a snack.
What makes honey buttermilk oat bread unique?
When it comes to high altitude honey buttermilk oat bread, its uniqueness shines through in the thoughtful selection of ingredients:
- Oats: They give the bread a lovely texture and added fiber, making each slice filling and nutritious. Plus, the nutty flavor enhances the overall aroma while baking.
- Honey: Using honey instead of refined sugar not only provides natural sweetness but also keeps the bread moist longer. Honey’s complex flavor profile adds depth that complements the buttermilk beautifully.
- Buttermilk: Known for its ability to create a tender crumb, buttermilk also reacts with baking soda, providing lift and a subtle tanginess that rounds out the flavors.
- High Altitude Adjustments: The careful adjustments made to this recipe—such as altering the liquid ratios and the flour types—ensure your loaf will rise perfectly every time, optimizing the unique conditions of baking at altitude.
By combining these ingredients with a few simple techniques, you can create a warm, inviting bread that not just elevates your meals but enriches your baking experience as well. Let’s dive into the specifics of making this delectable loaf!
Key Ingredients for High Altitude Honey Buttermilk Oat Bread
Bread Flour: To achieve the ideal structure and rise in your high altitude honey buttermilk oat bread, bread flour is a must. It packs more protein than all-purpose flour, creating that delightful chewiness and strength needed to withstand higher elevations.
Old Fashioned Rolled Oats: These oats not only provide a hearty, nutty flavor but also contribute significantly to the nutritional profile of your bread. They help make each slice more filling and satisfying, perfect for a morning toast or midnight snack.
Red Star Platinum Premium Yeast: Ensuring a reliable rise, this active yeast is your best friend in high-altitude baking. Its unique formula boosts dough strength and rise, giving your bread a light yet delightful texture.
Coarse Kosher Salt: This key ingredient enhances the overall flavor of your bread. It also aids in maintaining the dough’s hydration, which is critical for achieving that perfect crumb.
Honey: Not just for sweetness, honey adds moisture and helps create a stunning, golden-brown crust that’s simply irresistible.
Unsalted Butter: For a rich flavor and tender texture, unsalted butter works wonders in this recipe, elevating every bite.
Buttermilk: The natural acidity of buttermilk brings moisture and interacts with baking soda, resulting in a beautifully light and airy crumb.
Eggs: They play a vital role in contributing to the structure and richness of your bread, making every slice not just tasty but also satisfying.
These ingredients are essential for crafting the perfect high altitude honey buttermilk oat bread, ensuring every bite is both nutritious and delicious. Happy baking!
Why You’ll Love This High Altitude Honey Buttermilk Oat Bread
If you’ve ever baked at high altitudes, you know it can feel like a dance with dough—sometimes graceful, sometimes a challenge. The high altitude honey buttermilk oat bread is not only a delectable addition to your breakfast table but also the perfect solution for those tricky baking conditions.
Imagine pulling a warm loaf out of the oven, its golden crust crackling as you slice into it, revealing a tender crumb infused with the subtle sweetness of honey and the delightful nuttiness of oats.
A Unique Flavor Profile
-
The combination of buttermilk and honey creates a rich flavor that keeps the bread moist and adds a touch of sweetness, making each slice heavenly.
-
Using oats not only contributes to the flavor but also enhances the nutritional value of the bread, bringing fiber and heartiness to your mornings.
Perfect for Any Occasion
Whether you enjoy it slathered with butter, paired with jam, or even as a base for your favorite sandwich, this bread fits every occasion.
Easy to Make
With straightforward instructions, even beginner bakers can master this recipe. Just mix, knead, and let it rise—no fancy equipment required.
In short, if you’re ready to elevate your baking game and indulge in the most scrumptious loaf, this high altitude honey buttermilk oat bread should be your next culinary adventure!

Cooking Tips and Notes for High Altitude Honey Buttermilk Oat Bread
Baking at high altitudes can feel like a culinary adventure filled with both challenges and triumphs, especially when it comes to creating your high altitude honey buttermilk oat bread. As you embark on this baking journey, here are some essential tips to ensure your bread rises beautifully and tastes delightful.
Adjust the Liquid
At high altitudes, the air is drier which can affect hydration. Consider adding an extra tablespoon of buttermilk to your dough. This small adjustment can help retain moisture, preventing a dry loaf.
Mind the Flour
When measuring your flour, spoon it into your measuring cup and level it off with a knife rather than scooping directly. This technique ensures you’re not using too much flour, which can lead to an overly dense bread.
Watch the Oven Temperature
Since ovens can behave differently at high altitudes, keep an eye on your bread as it bakes. You may need to reduce the temperature by 25°F for a more even cook and avoid a sunken loaf.
Let it Rise
Allow your high altitude honey buttermilk oat bread enough time to rise—don’t rush it! The higher elevation demands a longer proofing time for the yeast to work its magic. This patience will reward you with a light, airy texture.
Cool Properly
Once baked, allow the bread to cool on a wire rack. This will help maintain its texture and prevent becoming soggy on the bottom.
Remember, each batch is a learning opportunity. Enjoy the process and the delicious outcomes!
Variations for High Altitude Honey Buttermilk Oat Bread
Creating high altitude honey buttermilk oat bread opens up a world of delicious possibilities. Whether you want to elevate your loaf or explore delightful add-ins, these variations will make every bite unique and memorable.
Sweet Add-ins
- Dried Fruits: Consider adding in some chopped dried cranberries or raisins for a burst of sweetness and chewy texture. This will enhance your bread’s flavor profile beautifully.
- Nuts: For a satisfying crunch, lightly toasted walnuts or pecans pair excellently with the honey. They add richness and healthy fats that make the bread even more satisfying.
- Spices: A dash of cinnamon or nutmeg can bring warmth to your loaf. Try adding a teaspoon of vanilla extract to amplify the flavor even further!
Savory Twists
- Cheese: Mixing in shredded cheese, like cheddar or feta, provides a delightful flavor contrast. The creamy richness complements the sweetness of the honey.
- Herbs: Fresh herbs like rosemary or thyme can transform the bread into a savory masterpiece. Just a few tablespoons finely chopped will impart fantastic aroma and flavor.
- Garlic: Adding roasted garlic can also turn your high altitude honey buttermilk oat bread into a savory delight, perfect for serving with soups or as a side dish.
With these variations, you can adapt and enjoy your high altitude honey buttermilk oat bread like never before!

Time Breakdown for High Altitude Honey Buttermilk Oat Bread
Making your own high altitude honey buttermilk oat bread is not just rewarding; it’s a delightful way to fill your home with warm, comforting aromas. Understanding the timing of each step can make your baking journey smoother and more enjoyable. Here’s how the time breaks down:
Preparation time
Get your ingredients out and ready, and mix everything up in about 15 minutes.
Rising time
Once the dough is mixed, allow it to rise for approximately 1 hour. This is crucial for developing that airy texture we love.
Baking time
After rising, pop it into the oven for about 30 minutes to achieve that golden-brown, crusty exterior.
Total time
Overall, you’re looking at around 1 hour and 45 minutes from start to finish, including preparation, rising, and baking. Enjoy every moment of creating this tasty bread!
Nutritional Facts for High Altitude Honey Buttermilk Oat Bread
When you take a bite of high altitude honey buttermilk oat bread, you’re enveloped in a delightful balance of flavors and textures. Here’s a quick look at the nutritional benefits packed in each slice, making this treat not just delicious but also wholesome.
- Calories per slice: Approximately 120 calories, making it a satisfying yet light option.
- Carbohydrates: With around 20 grams per slice, this bread offers energy to fuel your day, perfect for young professionals on the go.
- Protein: Each slice contains about 4 grams of protein, providing a solid base for your meals.
- Fat: At roughly 2 grams of fat, this bread is low in unhealthy fats, ensuring you enjoy a nutritious treat.
- Fiber: With about 3 grams of fiber, it supports healthy digestion and keeps you feeling full longer.
Enjoy your high altitude honey buttermilk oat bread as part of a balanced diet, and relish the homemade goodness every bite brings!
FAQs about High Altitude Honey Buttermilk Oat Bread
Baking high altitude honey buttermilk oat bread isn’t just about throwing ingredients together; it’s a science! With the unique environment at higher elevations, you’ll often find that recipes need slight tweaks. This section aims to help you navigate the essential questions that might arise during your baking adventure.
Why is high altitude baking different?
At high altitudes, the atmospheric pressure decreases, causing baked goods to rise more quickly. This means your high altitude honey buttermilk oat bread can dry out faster and may need adjustments to retain moisture and structure. Additionally, water boils at a lower temperature, affecting how ingredients hydrate and cook.
How can I adjust this recipe for lower altitudes?
If you’re at a lower altitude, consider the following:
- Increase the liquid: Add an extra tablespoon of buttermilk to maintain moisture.
- Decrease the leavening agents: Reduce baking powder by about 1/4 teaspoon to prevent over-rising.
- Adjust the oven temperature: Lower it by 25°F to prevent the bread from cooking too quickly on the outside.
Can I freeze this bread?
Absolutely! This high altitude honey buttermilk oat bread freezes beautifully. Slice it before freezing and wrap each slice in plastic wrap and then foil to protect it from freezer burn. When you’re ready to enjoy it, simply let the slices thaw at room temperature or pop them in the toaster for a quick warm-up.
What are the best serving suggestions?
This bread is wonderfully versatile. Here are some of my favorite serving ideas:
- Spread cream cheese on top for a rich breakfast treat.
- Add honey or fruit jam for a burst of sweetness.
- Pair it with soup or salad as a delightful side.
Now, you’re ready to tackle your baking journey with confidence! Enjoy creating your high altitude honey buttermilk oat bread!
Conclusion on High Altitude Honey Buttermilk Oat Bread
Creating high altitude honey buttermilk oat bread is an adventure in your kitchen that pays off with delightful aromas and a wholesome taste. This recipe doesn’t just yield bread; it offers a warm experience that transforms a simple loaf into a cherished family staple. Your efforts will manifest in its golden crust and tender, moist interior—a true testament to the love and care poured into each ingredient. As you savor a slice, perhaps slathered with butter or enjoyed with a warm cup of tea, take a moment to appreciate the journey of baking at altitude. Cherish every bite!
Print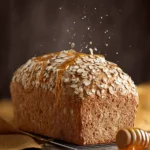
Homemade Bread
- Total Time: 2 hours
- Yield: 1 loaf 1x
- Diet: Vegetarian
Description
Delicious homemade bread made with a mix of bread flour and rolled oats for added texture.
Ingredients
Scale
- 2 1/2 cups bread flour (fluffed, spooned and leveled)
- 1 cup old fashioned rolled oats
- 1 packet (2 1/4 tsp) Red Star Platinum Premium Yeast
- 1 tsp coarse Kosher salt (if using table salt, use half the amount)
- 2 tbsp honey
- 3 tbsp unsalted butter (divided)
- 1 cup buttermilk
- 1 large egg (room temperature)
Instructions
- In the bowl of your stand mixer, combine the flour, oats, yeast and salt.
- In a saucepan, warm the honey, butter (2 tbsp) and buttermilk to between 110-115 degrees Fahrenheit.
- Add the warm buttermilk mixture and the egg to the dry ingredients, then stir into a shaggy, sticky dough.
- With the dough hook, knead the dough for five minutes.
- Scrape the dough into a greased bowl. Cover the bowl with plastic wrap and set in a warm place to rise until doubled in size.
- Melt the remaining 1 tbsp butter, and lightly brush the inside of a 1-lb bread loaf pan with some of the butter.
- Turn the dough out onto a floured counter, and gently press or roll the dough out to about 8×15 inches.
- Roll up the dough into a log, and place the log of dough into the greased loaf pan, with the seam facing down and the ends of the bread tucked down.
- Set the pan in a warm place and let the dough rise again, about 30-40 minutes, until the dough has risen several inches above the top edge of the pan.
- Brush the top of the dough gently with the rest of the melted butter. If you like, sprinkle the top of the bread with a few oats – these look nice on top after baking, but note that they do fall right off as soon as you slice the bread.
- Preheat the oven to 375 F, and position a rack in the center of the oven.
- Bake the bread for about 45 minutes, until the crust is golden brown, and a digital instant read thermometer inserted into the center of the bread reads 195F.
- Remove the bread from the pan and set it on a cooling rack. Cool for at least one hour before slicing.
Notes
- Ensure that all ingredients are at room temperature for the best results.
- To enhance the flavor, consider adding herbs or spices to the dough.
- Prep Time: 10 minutes
- Cook Time: 45 minutes
- Category: Breads
- Method: Baking
- Cuisine: American
Nutrition
- Serving Size: 1 slice
- Calories: 120
- Sugar: 1g
- Sodium: 200mg
- Fat: 4g
- Saturated Fat: 2g
- Unsaturated Fat: 2g
- Trans Fat: 0g
- Carbohydrates: 20g
- Fiber: 2g
- Protein: 4g
- Cholesterol: 40mg