Follow Me On Social Media!
Stained Glass Cookies: Irresistibly Sweet and Colorful Delights
Introduction to Stained Glass Cookies
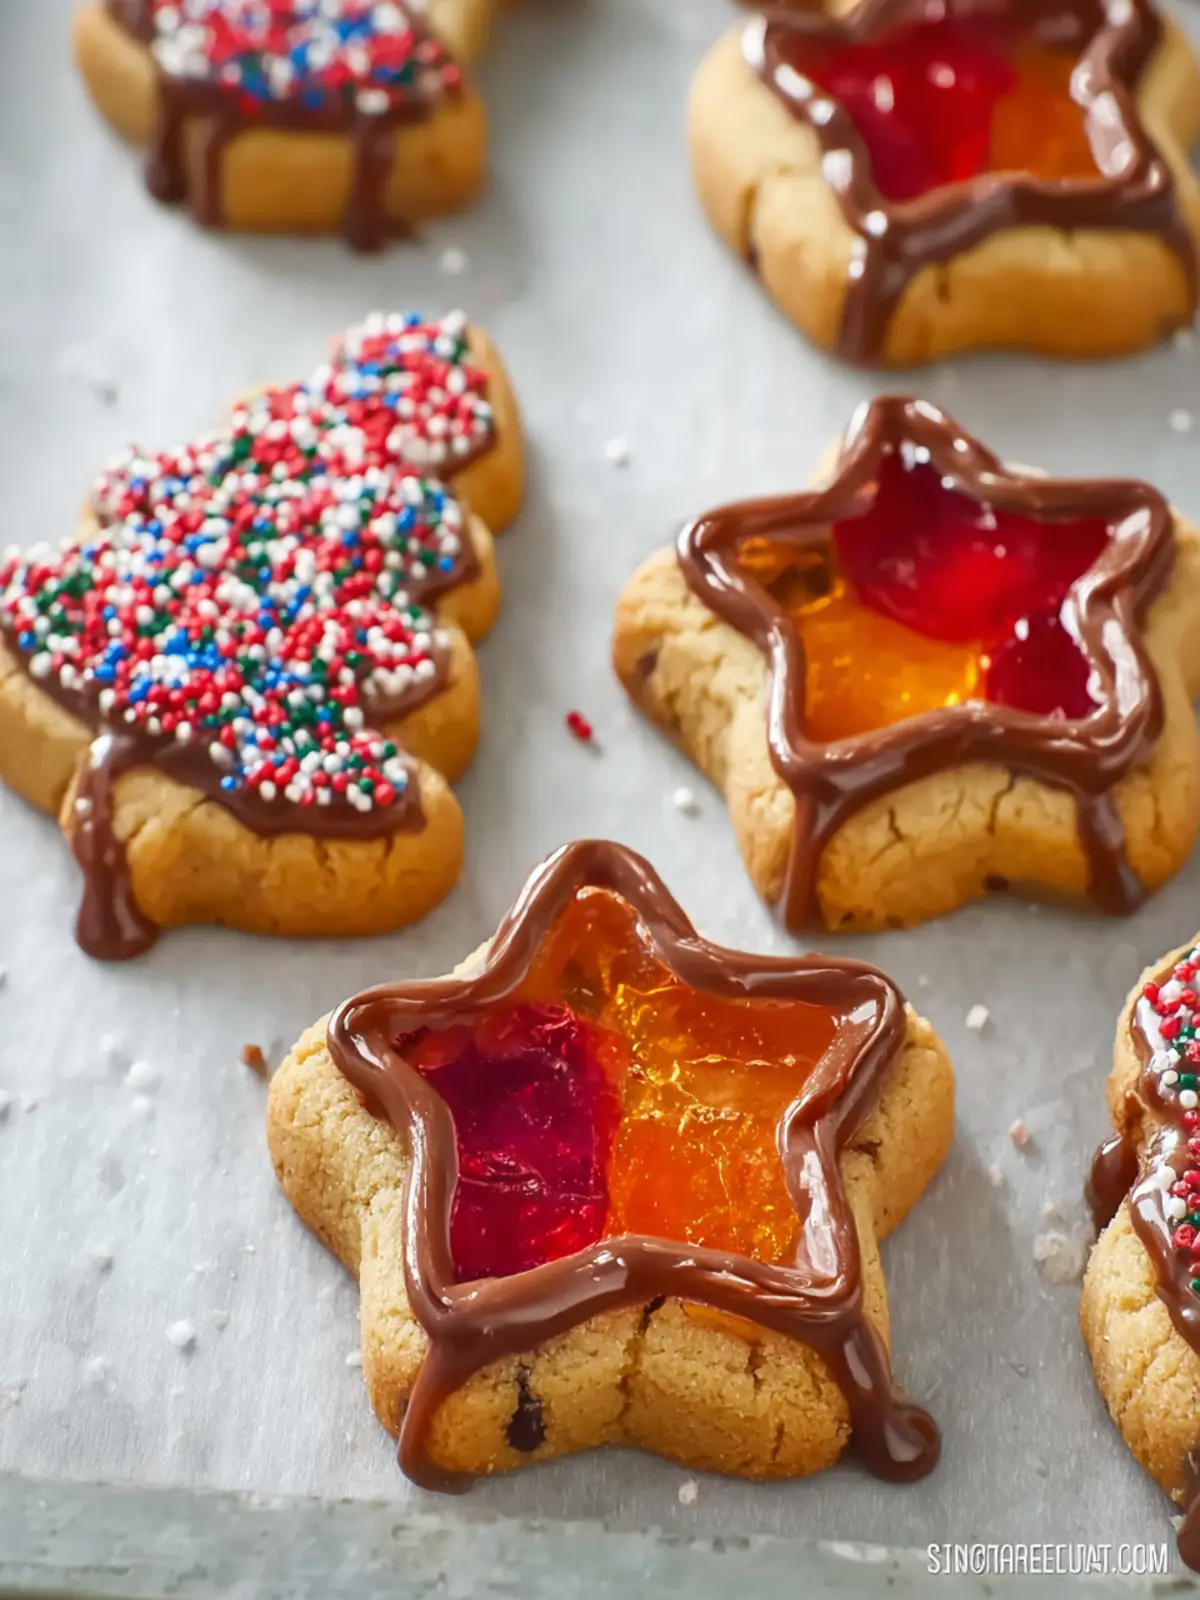
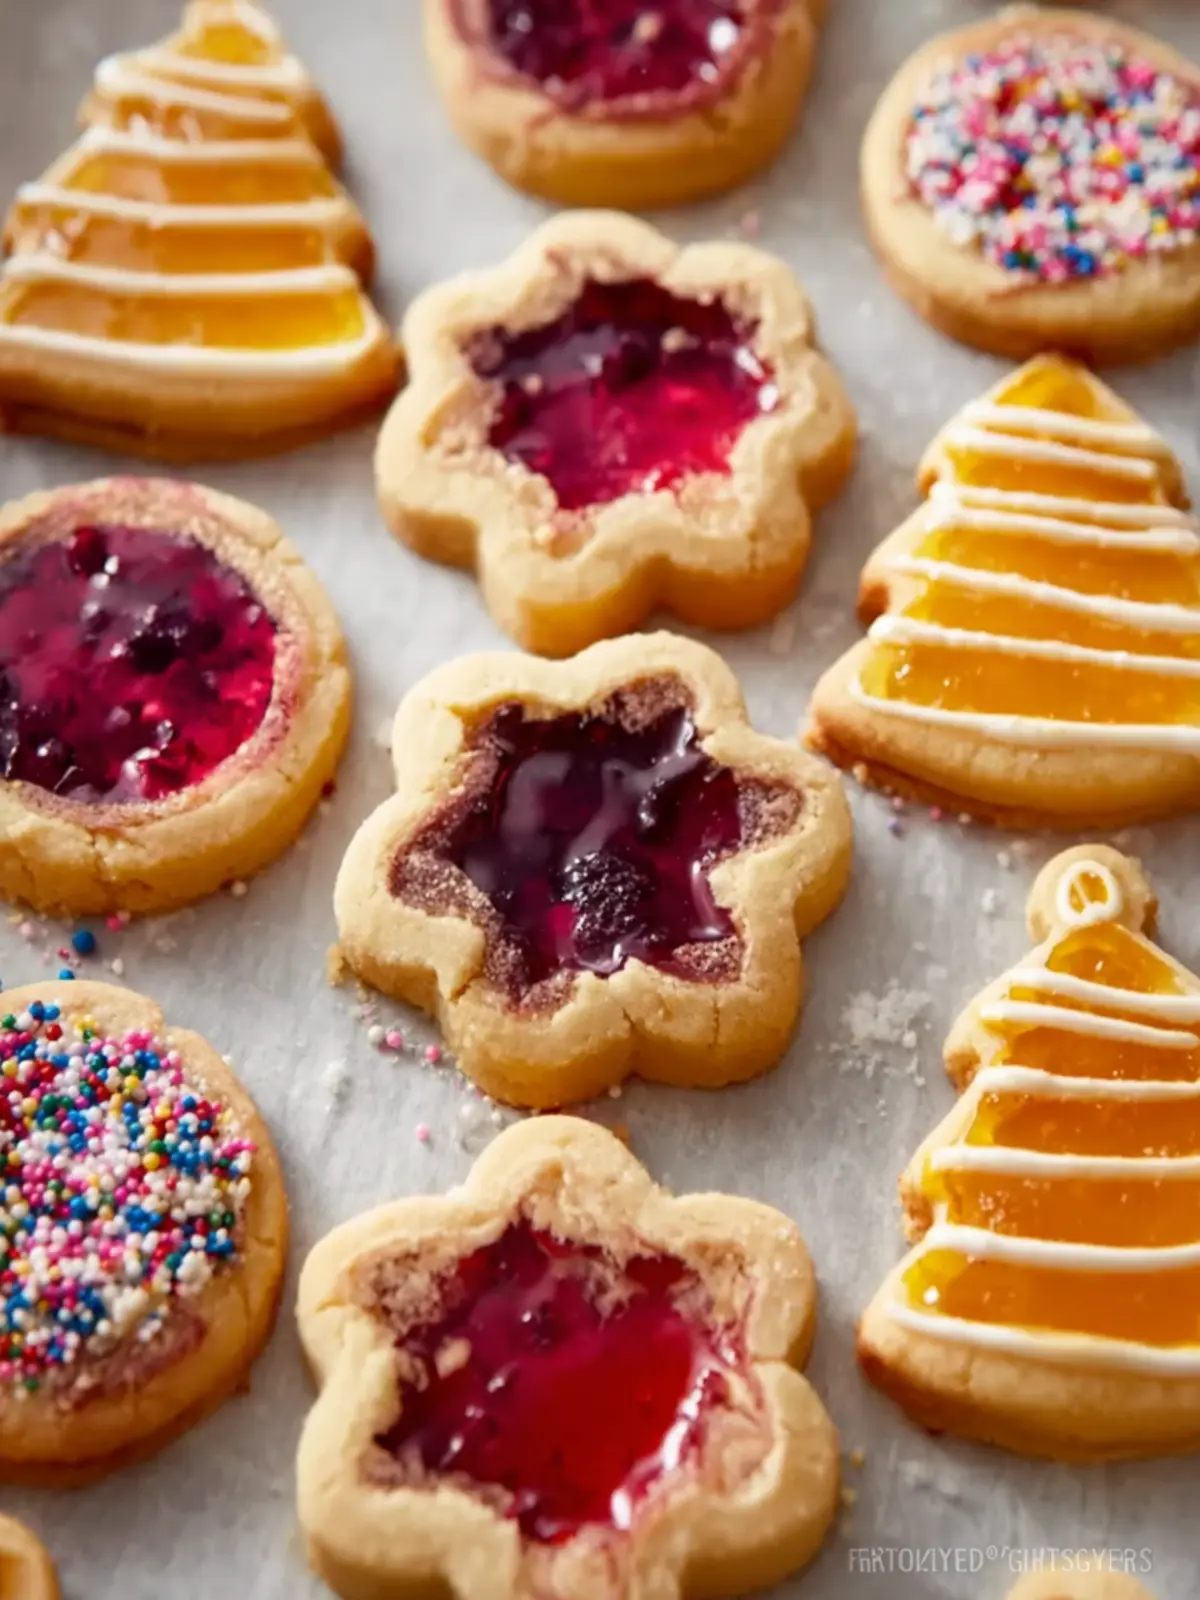
Stained glass cookies are more than just a delightful treat; they are a canvas for creativity and a testament to the joy of baking. Picture this: a vibrant assortment of colors glistening from within a crispy cookie shell, resembling beautiful stained glass windows. The moment you bite into one, the crunchy exterior gives way to a sweet, chewy interior, making these cookies a favorite during the holidays and beyond.
What makes stained glass cookies such a delightful treat?
There’s something truly magical about stained glass cookies. They can brighten any occasion, from festive gatherings to cozy family celebrations. Here are a few reasons why they hold a special place in the hearts—and stomachs—of many:
-
Visual Appeal: The gem-like quality of melted candies gives these cookies an artistic flair. Each batch can be a unique masterpiece, inviting creativity with color combinations and shapes. Kids love to help with this part, allowing for family bonding and fun.
-
Flavor Variety: While the vibrant appearance catches the eye, the flavor doesn’t hold back either. These cookies are often based on a classic sugar cookie recipe, which can be easily enhanced with vanilla, almond extract, or even citrus zests for a refreshing twist.
-
Versatile Occasions: Stained glass cookies are suitable for any festivities. Whether during Christmas, Halloween, or birthdays, their unique appearance makes them a suitable centerpiece for dessert tables, sparking conversations and delighting guests.
-
Simple Yet Impressive: Even if you’re a beginner in the kitchen, these cookies are relatively easy to make, and the results can be stunning. It’s like a beginner’s art project, but the best part is you can eat your creation afterward!
Imagine baking with family, sharing stories, and creating mouthwatering memories that last far beyond the last crumb. As you delve into making stained glass cookies, embrace the messiness and joy of the journey—after all, that’s where the sweetest moments often lie.
Key Ingredients for Stained Glass Cookies
Creating stained glass cookies is like crafting edible art; each ingredient plays a crucial role in achieving that perfect balance of flavor and visual appeal.
-
Butter: This essential ingredient brings richness to your cookies. I prefer unsalted butter for control over the sweetness, which allows the vibrant colors of the candies to shine through.
-
Granulated Sugar: For sweetness, granulated sugar is your go-to. It provides that classic cookie texture—crispy on the edges and chewy in the center, enhancing the overall experience.
-
Eggs: Eggs are the binding force in this recipe. They provide structure, moisture, and a bit of lift. Be sure to use large eggs for consistent results.
-
All-Purpose Flour: The backbone of any cookie dough, all-purpose flour gives the cookies their shape and texture. Make sure to spoon the flour into your measuring cup to avoid packing it down and getting too much.
-
Baking Powder: This leavening agent helps the cookies rise, creating a fluffy texture that balances nicely with the melted candy inside.
-
Hard Candies: The star of the show! Broken pieces of hard candies like Jolly Ranchers or Life Savers are melted into the center, creating that beautiful stained glass effect.
These key ingredients come together to create delightful stained glass cookies that are as tasty as they are visually stunning, making them perfect for any occasion.
Why You’ll Love These Stained Glass Cookies
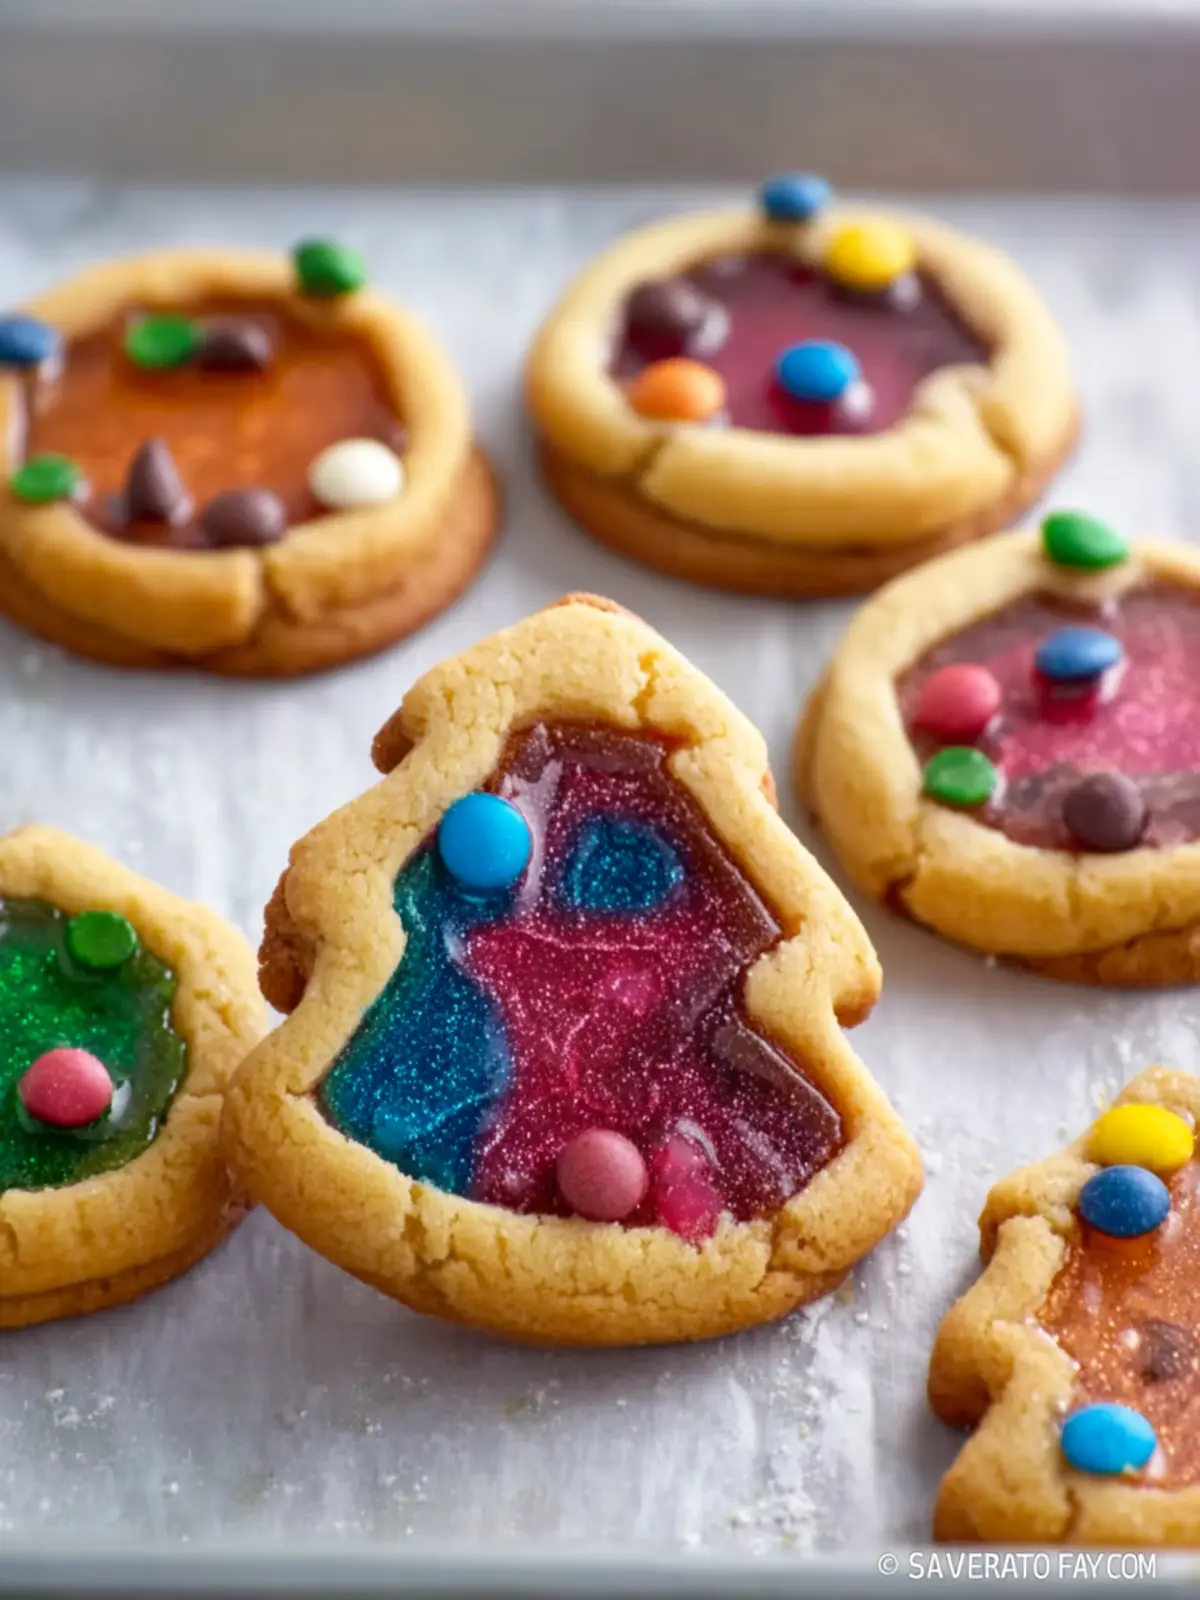
Imagine a cheerful kitchen filled with the sweet aroma of freshly baked stained glass cookies as you craft colorful treats that brighten any occasion. With their dazzling jewel-like centers, these cookies not only catch the eye but also bring a delightful crunch and burst of flavor to every bite.
A Festive Delight
These cookies are perfect for celebrating holidays, gatherings, or just adding a sprinkle of joy to your day. Their vibrant, translucent centers are made from crushed hard candies, giving each cookie a unique splash of color that’s bound to impress friends and family. Plus, they’re a wonderful canvas for creativity—let your artistic side shine as you experiment with shapes and colors!
Easy to Make, Fun to Share
Making stained glass cookies is a fantastic way to unwind and enjoy quality time with family or friends. The hands-on process—from rolling the dough to cutting out shapes—makes them a fun baking project. The best part? You can get the kids involved! Watching their excitement as the cookies transform in the oven is a joy that makes the effort worthwhile.
With a combination of simple ingredients and a dash of creativity, these cookies become more than just a treat—they’re a celebration of color, flavor, and shared moments that you’ll want to make again and again.
Variations of Stained Glass Cookies
Baking stained glass cookies opens a world of creativity in the kitchen. With their vibrant, jewel-like centers, these cookies are not just a treat for the taste buds but also for the eyes. While the classic recipe is always delightful, there are a few fun variations to consider that can add a personal twist to your crafty baking experience.
Flavor Infusions
- Citrus Twist: Incorporating lemon or orange zest into your dough can brighten the flavor profile, giving your stained glass cookies a refreshing kick.
- Spice It Up: Adding cinnamon or ginger to the dough brings warmth and a comforting aroma—perfect for a cozy evening.
Shaped and Themed Cookies
- Holiday-Ready Designs: Use cookie cutters to create themed shapes. Think hearts for Valentine’s Day, stars for Christmas, or pumpkins in the fall.
- Layered Colors: Instead of just one kind of candy in the center, layer different colors of crushed candies for a rainbow effect—guaranteed to impress at any gathering.
Dietary Adjustments
- Gluten-Free Version: Substitute regular flour with a gluten-free blend to cater to dietary needs, allowing everyone to enjoy your stunning creations.
- Vegan Substitute: Replace butter with coconut oil or vegan butter and use a flaxseed mixture as an egg replacement, ensuring your stained glass cookies are delicious and inclusive.
By experimenting with these variations, you’ll develop a range of stained glass cookies that not only satisfy your sweet tooth but also showcase your baking prowess. Happy baking!
Cooking Tips and Notes for Stained Glass Cookies
Creating stained glass cookies is not only a fun baking project but also a beautiful way to impress your friends and family. Here are some insightful tips to ensure your cookies come out vibrant and delicious every time.
Choose Your Candy Wisely
The best part of stained glass cookies is the colorful candy centers. Opt for hard candies like Jolly Ranchers or Life Savers, as they melt beautifully and create that stunning glass effect. Avoid using chocolate candies—they won’t give you the same visual appeal.
Chill Your Dough
To prevent your cookies from spreading too much while baking, chill the dough for at least 30 minutes before rolling it out. This way, you’ll maintain the shapes you’ve carefully cut out, ensuring each cookie holds its form.
Don’t Skip the Parchment Paper
Baking your stained glass cookies on parchment paper can save you a world of hassle. This not only prevents sticking but also makes cleanup a breeze!
Be Mindful of Baking Time
Every oven is different, so keep an eye on your cookies while they bake. They should be lightly golden around the edges. Overbaking can lead to hard cookies, so check them a minute or two early.
Experiment with Shapes
Get creative with cookie cutters! While classic shapes like stars and hearts are lovely, using seasonal shapes can add a festive touch to your stained glass cookies.
Serving Suggestions for Stained Glass Cookies
Serving stained glass cookies is all about enhancing the beauty of these colorful confections. Picture a cozy gathering where you bring these delightful treats to the table. Here are some ideas to elevate your cookie experience:
-
With a Cup of Tea or Coffee: These cookies are perfect alongside your favorite hot beverage. The intricate designs shine against a warm mug, inviting everyone to take a bite.
-
As Party Favors: Wrap each cookie in clear bags tied with a colorful ribbon. They make charming gifts, perfect for birthdays or holiday celebrations.
-
On a Dessert Platter: Combine your stained glass cookies with other treats like brownies and fruit tarts for a visually stunning dessert spread.
-
Decorated for the Occasion: Consider adding themed decorations, like edible glitter or icing, to fit a holiday or celebration. This small touch makes them even more special.
With these serving suggestions, your stained glass cookies will surely be the star of any gathering.
Time Breakdown for Stained Glass Cookies
Preparation time
Making these stained glass cookies is an enjoyable process that requires about 30 minutes of preparation. This time includes mixing the dough and cutting out the shapes. The vibrant colors you’ll use make it feel like an artistic endeavor in the kitchen!
Baking time
Once your cookies are ready for the oven, they’ll need about 10-12 minutes to bake. Keep an eye on them during the last few minutes; you want that beautiful golden edge without overbaking.
Total time
In total, you’re looking at roughly 45-50 minutes from start to finish for a batch of these delightful stained glass cookies. They’re well worth the time, especially when you see the smiles they bring!
Nutritional Facts for Stained Glass Cookies
When it comes to indulging in stained glass cookies, understanding their nutritional profile can enhance your baking experience. These delightful cookies are not just a feast for the eyes but also provide some nutritional benefits worth noting.
Calories
Each stained glass cookie typically contains around 90-100 calories. These vibrant treats are perfect for celebrating special occasions without derailing your nutrition goals.
Protein
With about 1-2 grams of protein per cookie, they offer a small boost to support your daily intake. While they aren’t a primary protein source, pairing them with a glass of milk can be a delightful way to enhance your snack.
Carbohydrates
With approximately 15-20 grams of carbohydrates, these cookies balance sweetness with a hint of texture from the candy in the center. They’re a fun way to enjoy a sugary treat while still being mindful of your overall diet.
Baking stained glass cookies can be a rewarding way to engage with food, and knowing their nutritional facts allows for a healthier relationship with indulgence.
FAQs about Stained Glass Cookies
Stained glass cookies are a festive delight, combining the charm of traditional cookies with a fun, colorful twist. This unique treat is perfect for gifting or holiday gatherings, but you might have questions. Let’s dive into some common inquiries you may have about these enchanting cookies!
Can I use different types of hard candies?
Absolutely! While classic stained glass cookies often call for clear hard candies like Jolly Ranchers or Life Savers, you can get creative. Feel free to experiment with various flavors and colors. Just keep in mind that darker candies may affect the overall appearance, as they might not melt into that beautiful glass-like finish. Play around with your favorites to find the perfect blend for a personalized touch!
How do I store stained glass cookies?
To keep your stained glass cookies fresh, store them in an airtight container at room temperature. They’ll stay delicious for about a week. If you want to preserve their stunning appearance, it’s best to avoid stacking them directly on top of one another. Instead, use parchment paper to separate layers, preventing any accidental sticking.
Can I make the dough ahead of time?
Yes, making the dough ahead of time is a great idea! You can prepare the dough and chill it for up to 24 hours before rolling and shaping your cookies. This not only saves you time on baking day but also enhances the flavors, making your stained glass cookies even more delightful. Just let it sit at room temperature for a few minutes before rolling to make it easier to handle.
With these tips, you’re well on your way to creating the perfect batch of stained glass cookies that will wow your friends and family!
Conclusion on Stained Glass Cookies
Creating stained glass cookies is not just about baking; it’s about crafting edible art that brings joy to those who create and share them. With vibrant colors shining through the delicate dough, these cookies are perfect for any occasion, from festive celebrations to sweet treats for your loved ones. Remember to experiment with different candy combinations to customize your cookie designs, making each batch uniquely yours. As you bite into these delightful cookies, you’ll find that the satisfying crunch perfectly contrasts with the sweet, gooey center—a truly enjoyable experience. Cherish the moments made while baking these delightful treats!
Print
Candy-Filled Cookies
- Total Time: 30 minutes
- Yield: 24 cookies 1x
- Diet: Vegetarian
Description
Delicious cookies filled with melted hard candies, perfect for any occasion!
Ingredients
Scale
- 2 1/2 cups all-purpose flour
- 1 cup unsalted butter, softened
- 1 cup granulated sugar
- 1 large egg
- 1 teaspoon vanilla extract
- 1/2 teaspoon almond extract
- 1/2 teaspoon baking powder
- 1/4 teaspoon salt
- 24 assorted hard candies (such as Jolly Ranchers or Life Savers), crushed
Instructions
- Preheat oven to 350°F (175°C). Line baking sheets with parchment paper.
- In a large bowl, cream together the softened butter and granulated sugar until light and fluffy.
- Beat in the egg, vanilla extract, and almond extract until well combined.
- Whisk together flour, baking powder, and salt in a separate bowl, then gradually mix into the butter mixture until a dough forms.
- Roll out the dough to about 1/4-inch thickness. Cut out shapes with cookie cutters, then cut out smaller shapes from the centers. Transfer cookies to prepared baking sheets.
- Fill the center cutouts with crushed hard candies.
- Bake for 8-10 minutes or until the edges are lightly golden and the candy centers have melted.
- Cool cookies completely on the baking sheets before removing to allow the candy centers to set.
Notes
- Store cookies in an airtight container for up to five days.
- Experiment with different types of hard candies for varied flavors!
- Prep Time: 20 minutes
- Cook Time: 10 minutes
- Category: Dessert
- Method: Baking
- Cuisine: American
Nutrition
- Serving Size: 1 cookie
- Calories: 150
- Sugar: 12g
- Sodium: 100mg
- Fat: 7g
- Saturated Fat: 4g
- Unsaturated Fat: 2g
- Trans Fat: 0g
- Carbohydrates: 20g
- Fiber: 0g
- Protein: 1g
- Cholesterol: 30mg